Translate

Showing posts with label Gina K Designs. Show all posts

Tuesday, January 26, 2021

The Year of the Blended Background

I declare this the year of the blended background!


I call this card "Darkest Night" due to the sentiment and the background.  I used the following inks:  Memento Bahama Blue, Memento Paris Dusk and Colorbox Midnight.  I used a white gel pen for the stars.  The sentiment is from the Gina K Designs stamp set "To the Moon and Back" and is absolutely perfect for this card.  I used some iridescent sequins (which on second thought was probably a mistake since the card was perfect without it).  The technique is the Torn Paper Technique. 

I had a hard time finding a stamp set to use for the foliage silhouette.  Finally I decided on  the Inkadinkado "Down by the Seaside" set.  There is an image of a grassy foliage coming out of the middle of some seashells so I only stamped the top portion that was above the seashells.  I also did stamp surgery on the image that has a grass clump with a sign coming out of it that says Beach.  I cut the sign out of the image to create the smaller clumps of grass in the focal point of the card.

I recently purchased the Taylored Expressions blending brushes.  Everyone is selling blending brushes now and I have to tell you, they are way better for me than the foam rounds for getting a smooth blend.  No matter how careful I was before there was always one spot where you could see the outline of a round foam in the middle of my blends.  I always "fixed it" so it wasn't so obvious but it was still there.

These brushes are a game changer.  If I get a little heavy handed in one area it is really easy to blend it smooth again.  There will be a lot more blended backgrounds for me.  My daughter works at a veterinary clinic and likes my blended background cards to give as sympathy cards for the employees that have lost their pets.  The employees are loving the landscape blended backgrounds.  Here are some more.  


I have been trying to figure out what the two cards on the right need and I suddenly realized that the night scenes could use a moon and the sunrise scene could use a sun coming up.  That would make future cards with a lot of background space appear less sparse. 
 

Saturday, December 26, 2020

Beautiful Bees Stamp Set


 This card is made with the awesome stamp set designed by Melanie Muenchinger for Gina K Designs called Beautiful Bees.  My sister is a bee keeper so I just had to have it.  This is the first card I made with this set and while I am not happy enough with it to give it away (the honeycomb is lined up very messily) I am very happy with the design of it.  I would like to try this again.  It may work better to stamp the honeycomb hexagons individually then cut them out.  That would allow me to space them more evenly.

I had a few very sloppy areas in the honeycomb-one of which is hidden by a sequin, then I decided to add 2 more sequins.  I tried covering up the other messy spot of the honeycomb with a sequin but it was too close to the other one and didn't look right.

I used Hero Arts Ombre dye ink in the color "Butter Bar to Orange Soda" as well as my trusty Gina K Designs Black Onyx dye ink.  The layers were cut with Gina K Designs Master Layouts 1 dies.

I will try to remember to post a picture when I finally get around to making a better version of this card.

Just Add Color, the Current Free Gina K Incentive Stamp Set


I had fun playing with the Gina K Designs free incentive stamp set that came with the order my husband got me for Christmas.  The stamp sets change and you need to spend a minimal amount before you qualify for them but hey-free is free correct?  

I honestly didn't know if I would like this stamp set because I like clean and simple, one layer, elegant floral cards.  I thought about making the rainbow "brush strokes" like in the first card and then adding a black floral silhouette through the strokes but when I looked through my stamps I didn't have anything that I thought would work.  The third card pictured is actually the first of the three that I made.  I got a smudge in the white space where I wanted to put the sentiment so I decided to put the rainbow in the air and add the layered sentiment that you see.  It fit better in that arrangement. The last card I made is the middle one in the picture.  This type of card doesn't appeal to me but I know many people appreciate colorful cards and I like to use my stamps as much as possible so I did experiment with the "rings".  I figure I can still add a birthday sentiment to the inside or perhaps a different sentiment at a later date making it so that it can fit many occasions.

I send many cards per year to nursing homes and people that request card showers so the card that says you are beautiful like a rainbow is going to be perfect for that purpose.

I also used the Master Layouts 1 dies that was part of the gift my husband bought from Gina K Designs to cut the card layers and the ovals.  My paper cutting leaves a lot to be desired.  These dies are a game changer for me.

Saturday, December 19, 2020

The Versatile Gina K Designs Holiday Tapestry Stamp Set


I recently posted some embossed Christmas Cards I made (and 2 Birthday Cards) using this awesome Gina K Designs Holiday Tapestry Stamp set.  I wanted to make some cards that were not embossed so I gave it another try.  I used Gina K Designs Card stock in Blue Raspberry and Christmas Pine.  The green and blue inks are memento and the multi colored one is the multi-colored Tsukineko Kaleidacolor in the Spectrum Colors variety.  I am not sure if this is available any more but there are videos of how to make your own multi-colored temporary ink pads using baby wipes on You Tube.

The cards seemed a little bit boring so I added pearl embellishments to the flowers and I used Wink Of Stella to the leaf designs in the center of the designs at the top and the bottom of the cards.  You cannot see the sparkle in the photos but it really make the design seem special in real life.  

Sunday, December 13, 2020

Embossed Christmas and Birthday Cards


I am in love with the Gina K Designs Holiday Tapestry stamp set.  It works equally well for Christmas as for Birthdays or other occasions.  I made 2 Birthday cards using the set along with the Gina K Designs wreath builder template and one of the cards used some of the stamps from the original Wreath Builder stamp set.  I used the analagous colors of blue and green card stock (specifically Blue Denim and Fresh Asparagus Gina K Designs card stock) for the birthday cards.

For the Christmas cards I made 12.  3 are red and gold while 9 are blue and silver.  They are specifically made with the Gina K Designs Holiday Tapestry stamp set, Blue Denim Gina K card stock, Red Velvet Gina K card stock and Stampendous detail gold embossing powder plus Hero Arts silver embossing powder.  I had an unknown brand of silver and gold glitter papers for the background card stock and the black frame is also from an unknown brand.

As always, these are A2 sized cards (4 1/4 inches by 5 1/2 inches).

I do believe that the Holiday Tapestry stamp set with be my all time favorite set!

Thursday, December 10, 2020

Cards for Healthcare Workers


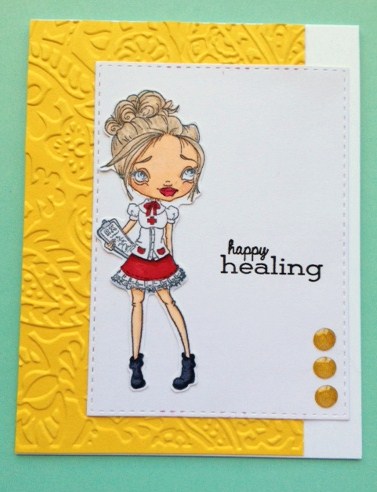
 I wanted to thank some healthcare workers so I pulled out some die cuts, some extra bases that I hadn’t finished figuring how to decorate and various stamp sets and this is what I came up with. 

Variations on a Theme


 I recently was playing around with my patterned papers and found two coordinating papers that I have been hoarding. I needed some quick cards that I could use to send to people when they were down in the dumps and this is what I came up with. 

Friday, August 7, 2020

Lining up Layered Stamps and Split Card Tricks

 I had so much fun using the Gina K Designs YouTube video on how to line up layered stamps so that I could use those with the Split Card Tricks Video by Jennifer McGuire.  I then went crazy and made even more types of cards with the many flowers that I made, die cut, and fussy cut.

WPlus9 Pretty Peonies, Altenew Vintage Roses stamp sets. Gina K Designs sentiment from a freebie.  Altenew mini cubes colored inks, Gina K designs Black Onyx ink.  Gemstones added.

Card tops created using 2 different EK Success border/edge punches.  They may be retired because I had a hard time researching them.  I was not able to find them online in my brief search.  The sentiments were from the Altenew Vintage Roses stamp set.  I used gemstones on one card and pearls on the other.  I used Wink of Stella on fthe lowers of the card on the right.

These cards were created using the Fabulous Frame stamp set from Gina K Designs.  I used pearls on some of the cards and gemstones on another one.  I used Gina K Designs card stock.


Saturday, March 9, 2019

Splitcoast Stampers Virtual Stamp Night "From Here to There" #2 Snacks for a car trip

Here is my second card from the 3 mini challenges on Virtual Stamp Night "From Here to There".
Snacks for a Road Trip

Splitcoast Stampers Virtual Stamp Night"From Here to There" #1 Inspirational Card

I love the challenges in Virtual Stamp Night.  This was the first time I did the mini challenge which was only 3 cards.  The challenge was to add arrows to a card.  I chose to imply that the arrows were adding strength and power to my bicycles.
Add arrows to your card "From Here to There" challenge

Monday, May 21, 2018

Gina K Designs Wreath Builder Stamp and Template-A Winner in my Book!

   Gina K was demonstrating her amazing wreath builder kit at a stamping meet I was at.  It had been sold out online and  I was giddy as a child when I learned she brought some for sale. 
     This card was made using only the stamps and template from the Wreath Builder set. 
     I used the Altenew  mini ink pad sets of 4 in the Tropical Forest collection for the Greens and in the Red Cosmos collection for the pink/red colors plus Gina K Designs Black Onyx for the sentiment. 
     I used Nuvo clear drops for the centers of the large flowers and Wink of Stella glimmer pen on the large flowers.  Then I added buttons to the bottom.  I used an old designer paper from JoAnns on the card base too. 


     This card again used only the Wreath Builder stamp set and template.  I used Wink of Stella glimmer pen on the thistles and Nuvo crystal drops for embellishing.  Then I added buttons. 
     I used memento inks for the purple and blues along with Gina K Designs Onxy Black for the sentiment.
     Buttons are my thing this year but I have noticed that it varies by year.  I like ribbons one year then sequins the next, then buttons, etc.
     This is the only wreath where I intentionally made the floral design slip inside the sentiment circle.  I think I like it done both ways.


     I simply cannot put this stamp/template set away.  It is addictive.  For this card I again used the Altenew  mini cube sets in the greens and pinks plus Gina K Designs Onyx Black for the sentiment.
     I added Wink of Stella glimmer pen to the large flowers and pearl embellishments. 
     It really is just a simple wreath with a sentiment but it speaks volumes.  I was never "into" wreaths before but I am SOLD now!


     This card also only uses the Gina K Designs Wreath Builder stamp set and template.  I embellished it with pearls and Wink of Stella glimmer pen for the large flowers and the red hearts.
     I intentionally used two different colors on the large flowers and for some reason this blend of colors if very striking to me.  I used memento inks for the purple, plus the Altenew mini cubes for the green and the pink/reds plus Gina K Designs Onxy Black Ink for the sentiment.


     This card has a more masculine feel from the colors and the deer.  Again I used only the Wreath Builder stamps and template, memento ink plus Gina K Designs Black Onxy for the sentiment.  I embellished with clear crystal Nuvo drops in the center of each flower and added the deer die cut from Gina Marie Designs.
     I decided to leave the banner the deer is on blank so as not to be overwhelming.  This card needed space to rest the eyes.


     I think this is my favorite wreath card so far.  I love the vintage feel to the colors and the pearl accents.  I did not use a central circle stamp around the sentiment and even though I love the ones that have it, I think I like this one better with the pale flowers inside. 
     I used the Altenew mini ink cube set for the greens  then memento ink for the pink and purple.  I also used Gina K Designs Black Onxy ink for the sentiments. 
     In addition to the pearl accents I used Wink of Stella glimmer pen on the large flowers. 

Saturday, March 19, 2016

Splitcoaststampers Virtual Stamp Night-Here Comes the Sun Challenge

     I participated in this challenge 1 day late.  It started on a Friday but I wasn't able to participate until Saturday.  Instead of participating in "Real Time" like I did in the past, I participated in it after the fact.  I have until tonight (Sunday) at 10pm to post all my cards to their gallery but I don't have enough time to complete the challenges in time.  This is what I was able to complete this weekend:


Turn Up the Heat challenge MAR16VSNC

     This card uses Hero Arts Dotted snowflake stamp with versamark ink and clear embossing powder, Papertrey Ink Aqua Mist for the sentiment (TPC Studios Brush Stroke Greetings) on Papertrey Ink Aquamist card stock, some coordinating ribbon I found some place (maybe Michaels?) and clear gemstones.  I tried a new technique on the die cut snowflake called multi-color embossing.  I masked the outer edges of the snowflake then applied versamark ink so I could use silver embossing powder.  After removing the mask and heat embossing it, I used my versamark pen to just apply versamark to the outer edges, then applied gold embossing powder and heat embossed it.  I really like the tone on tone effect with the pop of metallic shine in the center.

Made for Sunny Days Challenge MAR16VSNE

     For this card I created a serene scene at the beach using Papertrey Ink Aquamist Dye ink sponged on for the lake, Neenah Desert Storm card stock for the card base and stickers found at Dollar Tree.  I used Gina K Designs Black Onyx ink for the sentiment from Gina K Designs Ruby Reprise stamp set.

Give me a Head of Hair challenge MAR16VSNK

     Here is another Whimsy Stamps Jenny has the cure image.  (I have posted a few recently).  I used memento ink to stamp Jenny and Gina K Designs Black Onyx ink for the sentiment.  I colored Jenny with copics and used a bright yellow dry embossed scrap of card stock in honor of the Here Comes the Sun theme.  I also used stickers from Dollar Tree.  I like how the bright yellow makes it cheerful.

Round and Round Challenge MAR16VSNA

     This was my first attempt at making a circle card.  I made the card easily enough however I'm not sure when I will ever use it.  It was fun to try a new technique though.  The stamp is Stampalicious Bugaboo Poppi Cocoa  I also stamped the dotted background with Papertrey Ink Polkadot basics and Gina K Designs Moonlit Fog  Dye ink.  I die cut the scallop and scrap paper circle, then copic colored the edges of the scallop to coordinate with the copic colored mug.

Brighten the Grey challenge MAR16VSNH

     This is a simple card made for the color challenge of using grey with a pop of yellow.  I only have one background stamp and this is it.  I REALLY could use more background stamps.  This card would have been very boring without a background stamp.  The Stampabilities Faded Text background hopefully fades into the background though.  I used stickers from Dollar Tree and made a grey banner for the sentiment from TPC Studios Brush Stroke Greetings, using Gina K Designs Black Onyx dye ink.  I really like this color combo and saw many nice cards made with the combo at the Splitcoaststampers gallery. 

Sun Symmetry Challenge  MAR16VSNB

     I used the spirelli technique for the scalloped circle behind the heart.  I wrapped it in twine.  I have a paper doily behind everything and a scrap of red striped paper.  The heart was paper pieced with scraps and stamped in Gina K Designs Black Onyx dye ink using Simon Says Stamp Locking Hearts stamp set.  I also used large and medium red gems as embellishments.  The base card stock is Gina K Designs Black Onyx and the paper pieced heart was applied to Georgia pacific card stock before being die cut with Your Next Stamp's Scrapwork's mini sunburst die set.

Brand New Challenge MAR16VSNL


     I used this stamp and sentiment for the first time today.  I always thought it was the cutest thing but I never used it.  It is from Gina K Designs Heartily Yours stamp set, using Gina K Designs Black Onyx dye ink and Prismacolor colored pencils.  I used a copic marker to color a clear gemstone pink to add as an embellisment then glued a pink twine bow to the lava lamp.  The white focal piece is Neenah Solar white 110# and the base is left over from a long time ago.  The scrap patterned paper is likewise old enough that I'm not sure who makes it but I recall purchasing it from JoAnns individually.

Sunshine Box challenge MAR16VSND


     This is one of the Paper Nest Doll stamps I showed in a previous post during the recent 30 day coloring challenge.  She was stamped with Memento Tuxedo Black dye ink then colored with copic markers.  The sentiment is from Gina K Designs Ruby Reprise and stamped with Gina K Designs Black Onyx dye ink.  Two days ago I opened a box of chamomile tea and found this beautiful yellow gold pattern inside.  I immediately knew  I would be using it for a card, however I hadn't planned on removing all the tea bags so soon so I could use it for this challenge.  I then used Martha Stewart Daisy Wreath stickers because they remind me of Chamomile flowers.  The base card stock is Neenah solar white 110 #.  The image is stamped on Georgia Pacific which is the cardstock that works best for me when using copics.  It helps me conserve ink because it is thin and saturates quickly.

We'll Sing in the Sunshine challenge

     This is another image and sentiment that I hadn't yet used from Gina K designs Heartily Yours Stamp set.  I stamped it in Gina K designs Black Onyx dye ink and colored the birds with Prismacolor pencils.  I embellished it with a pearl and musical note stickers.  The white focal piece was die cut with stitched rectangle die cuts, and the gingham background scrap was also die cut from the same stitched rectangle set.  The base cardstock is Neenah Solar white 110 #.

Thursday, March 3, 2016

How Many Cards can you Make with a Mini Stamp Set?

     In January I ordered a mini stamp set from Gina K Designs called "Love is Friendship".  It had one image and one sentiment.


1
   

     I have heard stampers discuss the fact that you should think of three ways to use a stamp set before purchasing it so that you get your money's worth.  That sounds like sound advice because the stamp sets I never use do not inspire me to create different types of cards.
     The first card was inspired by a floral card created by Melanie Muenchinger.  It isn't as pretty as hers, but the inside front of the card is also stamped with the guitar so that it looks like it lines up with the front of the card.


2

     For my second card, I wanted to use some wood tone paper for the guitar.  It didn't turn out as I had hoped because the wood tone was on too big of a scale.  A smaller scale would have worked nicely.  I used Washi tape stripes.


3

     For the third one I did some simple masking of the guitar to make the hearts go behind it.  The stamp had three hearts in a row so I used my MISTI to line them up evenly.  I also performed "stamp surgery" on the sentiment because the entire sentiment wouldn't fit on one line where I wanted it to fit.


4
.
     I put even more work into the 4th card.  I used a script stamp on a panel behind the red and cut out a heart near the center.  I stamped the sentiment and guitar on black card stock and used versamark and silver embossing powder for the detail, plus I stamped a swirl near the bottom with the versamark and used the same silver embossing powder.  I then took my versamark pen and "drew" a line along the two edges of the panel behind the guitar and also applied silver embossing powder.  It makes it look like there is a third layer of card stock but it is the same layer the script stamp is applied to.  Then I took the entire panel and attached it to an A2 card base.  The right side of the photo has glare but the panel is centered on the card.

Tuesday, April 7, 2015

219 Cards on their way to Operation Write Home

     That is my final count.  219 cards in this shipment to Operation Write Home.  Most of them are tucked away in the box, but here are a few that I threw together at the last minute to pack that box to the brim.

Sliekje Digi Stamps-God is Just a Prayer Away
                                               
 Paper Smooches Hot Concoctions colored with Copics
 Gina K Designs Heartily Yours by Nina Brackett (discontinued).

Die cut chicken from the Silhouette Store,
 I cannot find the name of the border die.
  Joy's Life Barnyard Puns.


 TPC Studios Faith Greetings.  
Flowers from Online Card Classes Copic Markers for Card Makers class drawn by Kristina Werner.


The digital image was free but I am unable to locate it currently.